The Home Improvement Blog by Slide-Lok Garage Interiors
When To Paint Your House - 5 Useful Tips
Painting the interior of your home can be done year round, but exterior painting is best left to certain times of the year. When it comes to painting the exterior of your home you should read this article instead: The Best Time Of Year To Paint The Exterior Of Your Home
3/6/2020

When was the last time you painted the inside of your house?
Painting your house can be fun, it colorizes, adds character and invokes emotions in us. Painting should be part of home maintenance aiding in protecting your walls, wood frames and metal in your home. Paint forms a protective layer that is good at protecting and preserving your home for years to come. The general rule of thumb is to paint the inside of your home every 5-10 years. High traffic areas, like playrooms, should be painted every 5 years while bedrooms can be painted every 8-10 years. General wear-and-tear or moving into a house from an era where lead based paint was used should be reason enough to paint your home this season.
Lead Based House Paint Has Been Banned Since 1978
In 1978, the federal government banned the use of lead containing paint. If your home was built before 1978 then there is a very good chance your walls have lead based paint in them. Today, when you buy or rent a home built before 1978 you should get a pamphlet or statement that explains the hazards of lead based paints. Not to fear, the walls have most likely been painted over encapsulating the lead many times over in the past several decades.
Many people stay home during the winter months due to cold temperatures and snow days. Think about it, many companies need relatively warm and dry weather to do their job - construction workers, road workers, painters, concrete workers, etc. Of all the things to do in your home during the winter season you probably thought home improvement was out of the question. Well, that’s not entirely true. Winter is a great time to make improvements to the interior of your home and lucky you, winter is still here for nearly another month.
Painting your home’s interior might seem like something to save for the hot summer months, but think again! The dry and cool air inside your home during the winter months actually benefits the newly applied paint. Paint applied indoors should be applied at the right temperature, that is why many professionals recommend winter months for painting the inside of your home. For instance, you want the temperature of the air, the wall surface and the paint to be between 60-80 degrees fahrenheit to achieve a beautiful even finish. So before the next snow storm, pick up some painting materials to transform the inside of your home before spring.
Tips For Interior Painting
Achieving a flawless paint job is not just based on the temperature, but also knowing what to do and what not to do. Here are some useful tips and tricks to know before you begin painting your home:
1. Compare Price & Performance

Whether you decide to tackle painting yourself or hire a pro you should always compare prices. If you're looking to hire a professional painter you might not know this but winter weather typically means slower business for home improvement companies. This translates to contractors being more competitive in the bids they are giving out. Business is slower in the winter for contractors and construction in general, you can really score some good deals in the off season. Also compare bids by the types of paint or materials being used, you can ask the painter what they plan to use, that way you're not comparing apples to oranges. Contractor grade paints should not be assumed to be better than the higher end paints available at your local home improvement store.
You should also compare the price and performance of the paint material being used. There are more than a few name brand paints available, some of these you might even find at your local home improvement store such as Home Depot or Lowe's. The big names in paint include Behr, Benjamin Moore, Glidden, Sherwin-Williams and Valspar to name a few. All of the name brand paints are offered in several tiers or levels of performance, you can think of these as contractor grade, good, better and best. Typically contractor grade paints come in being the cheapest, and then two to three higher tiered paints ranging from $15-60 per gallon. We advise you set a budget for your project first, and then decide what paint and performance options you desire for your home. Performance characteristics of interior paints might include paint and primer all in one, one coat hide, superior scrub resistance, cooking / grease resistance, high or low gloss (sheen), etc... Consumer Reports recommends choosing sheen and color first and then choosing a paint that scores Very Good or Excellent in hiding cover, they find that the 'economy' paints don't perform well.
Pro Tip: Hiring contractors in their off season is a great way to get a discount for any home improvement project, not just painting. Landscaping, for example is similar to painting season, contractors are less busy in the wintertime.
2. Paint Prep: Use Tack Cloth To Clean Your Walls
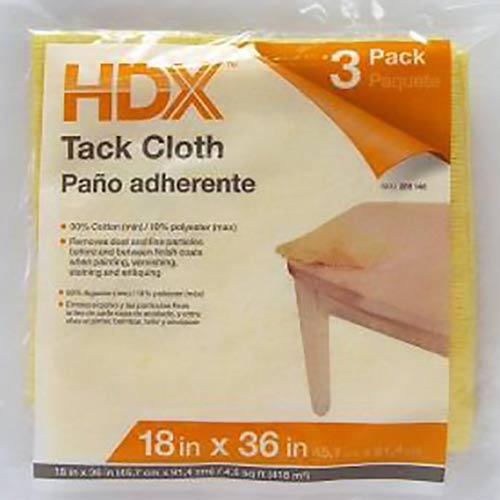
If you plan to tackle painting by yourself or you want to prep for the painters, then this tip is for you! When it comes time to paint your walls, baseboards, door and window trims, you want to make sure that there is not any dust or debris on the surface. Not cleaning these surfaces prior to painting can cause your paint to have bubbles or blemishes. Using a tack cloth can aid in the cleaning process prior to painting. Tack cloths are basically cheese cloths treated with a tacky material such as beeswax. Gently wiping walls with the cloth so that any debris and lint is caught by the tacky material is ideal, but make sure not to apply pressure when doing this because the wax can be transferred.
Painting Prep Recommendations From Major Manufacturers
- Behr: "If you need to remove any oil, grease or wax stains, apply a mild detergent with a sponge onto a lightly water-dampened surface, rinse with clean water and allow it to dry."
- Benjamin Moore: "While there is no best way to clean walls before painting, most walls can be washed using a sponge and warm water. For surfaces that have exposure to oil or grime, like kitchen walls, wash with a solution of water and grease-cutting detergent and follow up with clean water to remove any residual cleaning agent. Finish by wiping the walls with a damp cloth."
- PPG: "Wipe walls clean of dust and dirt."
- Sherwin-Williams: "Washing your walls and trim will remove grime, cobwebs, dust and stains that can prevent your paint from adhering. Use a mixture of lukewarm water and mild soap, gently rubbing in a circular motion. Rinse your walls using a slightly damp cellulose sponge."
- Valspar: "Moving from top to bottom, and using an ordinary sponge mop, clean the ceiling and walls thoroughly with TSP and water (according to the manufacturer's instructions). Rinse well and let dry. Get rid of dirt and dust. Vacuum and dust as much of the room as possible, especially along baseboards. Particles can get in the paint or on the brush and create quite a mess—leaving a bumpy result on your walls. For large areas, use a mop to wash all surfaces with a solution of TSP and water (according to the manufacturer's instructions). Rinse with water and let dry thoroughly."
Pro Tip: Never skip prep, the short amount of time you spend prepping is a fraction of the time you'll spend fixing any mistakes! Failure to properly prepare your surfaces prior to painting can mean wasted time and money on both materials and labor if you have to paint again. Nothing sucks more than having to sand your walls and paint again because of paint that fails to adhere in some places or have excess dust bunnies sticking up and out of the paint.
3. Purchase Quality Painting Materials

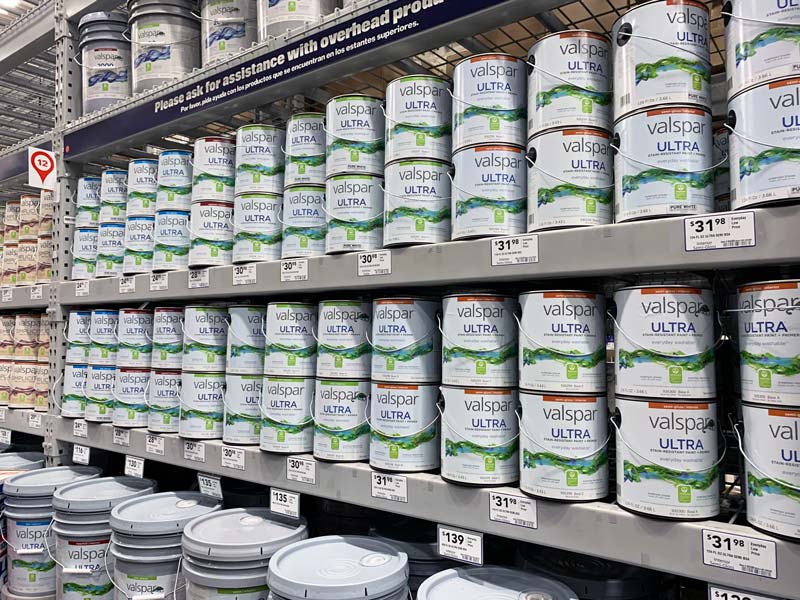
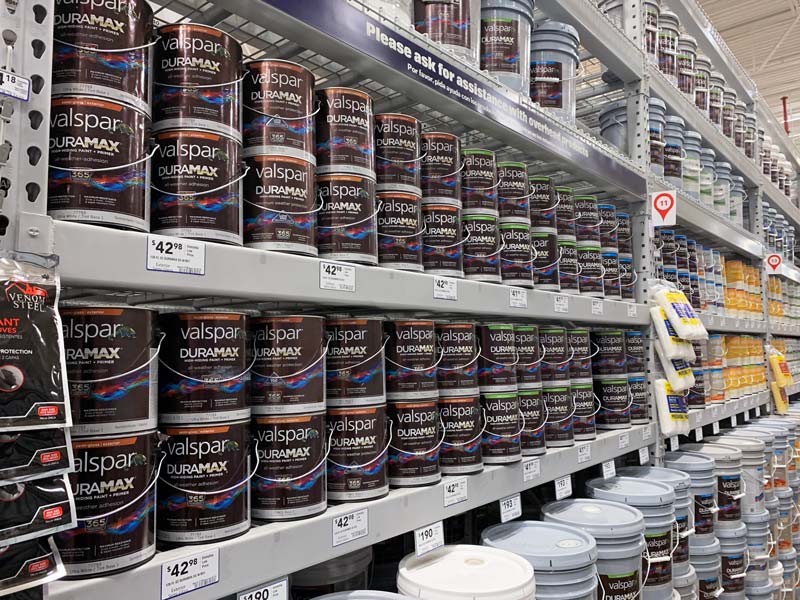
This goes well with point #1. Compare Price & Performance. The first point is to understand how price and performance vary, most of the time you get what you pay for. It should go without saying but when painting your house, you want to use high quality paint and materials that will apply smoothly without hassle and last for years. When it comes down to picking the right paint, this can be mind numbingly frustrating (look at all the options on the photo above) there are seemingly hundreds to choose from. First off, you do not want the cheapest paint that you find because this paint typically requires additional number of coats, has low scrub/scratch/mar resistance, or will not last as long as a higher end paint. Instead, you want to look for a high quality paint, typically one that has higher solids, creating a better paint build, higher scrub/scratch/mar resistance, etc...
Do some research on what paint is available in your area, unless you live in the middle of nowhere, you should have access to all of the major paint brands. We recommend reading reviews online or even going to your local home improvement store and asking the workers in the paint aisle for their recommendations and why. As far as paint brushes, rollers and rods: do your research and don’t be afraid to test them for lint transfers and brush fallout. If you are using them as testers and you see them shedding, then you know for sure you don’t want to use them for a project as important as your home. We typically prefer the lint free Wooster paint roller, foam rollers are also an excellent alternative.
4. Paint From The Ceiling Down - Work Top Down
Start painting your ceiling before anything else, this allows the ceiling to dry. Let’s say you painted the walls first and now you’re thinking I should have done the ceiling too. Well now you could potentially have paint running down your nicely painted walls. If you have crown molding then do those next. Try to do things in a clear thought out process, make steps for yourself, and allow each painted section a bit of drying time before moving onto the next. Cutting in closely is very important. You can do it before painting the walls, but many experts believe it is more efficient to paint the walls then cut into the wall with a paint brush for a flawless finish. An expert trick is to have a bucket of paint instead of a can. This allows less tipping accidents and you won’t end up with different shades (paint cans are more susceptible to differing shades). Next come the windows, pay extra attention to detail when painting your windows. Since the window areas allow light to shine through they act as focal points of rooms, it can showcase imperfections that you might not notice elsewhere. Lastly, doors. If you want a beautiful finish on your doors, take the extra time to unhinge them and lay them horizontally to paint. This will allow an even coat.
5. Clean & Reuse Your Paint Brushes and Rollers
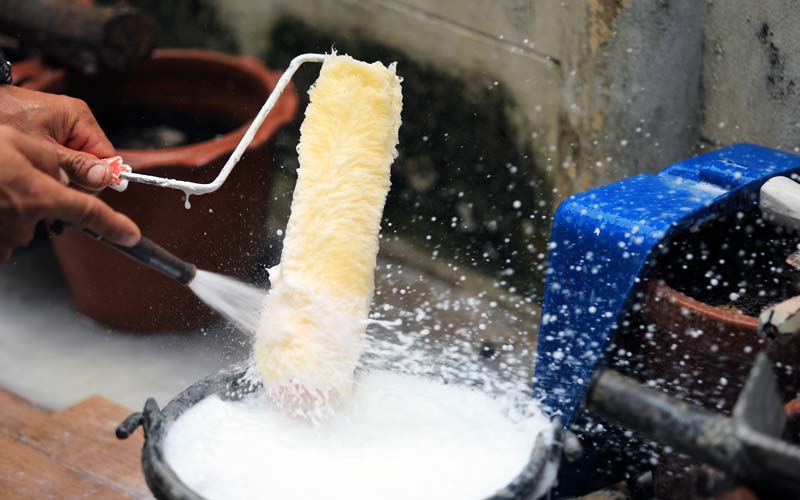
When it comes to painting your bedroom, living room or kitchen it can get tedious. There are many areas to be painted including the walls, windows, door trims, ceilings and baseboards. Whether the sun is starting to go down and you begin losing light or you are getting too tired, you start to realize this could turn into a two-day job. In this case you may not want to buy new brushes and rollers, so preserving them can save you money and a trip to the store for new ones, not to mention you're being environmentally friendly by not wasting more materials than you need. The old hack to clean brushes and rollers was to spray or soak them in water and soap, a great trick if you plan to paint the next day. This can only be done so many times before your brushes/rollers get depressed, faded, etc... This is only recommended for same color paint jobs and only one day apart. Multiple days apart and multiple colors can result in mixing colors/streaking on the wall, bristles/nap coming loose on the wall etc...
Painting professionals recommend these highly effective ways to preserve your brushes and rollers. Place them in a bag if you are looking to preserve them for only a few hours, the second way is placing them in a sealed air-tight bag and leaving them at room temperature. This will lock in the moisture and prevent them from hardening. Place them in the fridge, putting your brushes or rollers in a sealed air-tight bag and placing them in the refrigerator overnight can preserve them by keeping them cool. Make sure to set them out and allow them to warm back up to room temperature before using them again.
WikiHow recommends various methods for preserving, cleaning and reusing paint brushes to save money and be conscious of the waste you generate when painting your house.
- Wrap paint brush/roller in plastic.
- Wash off paint with soap and warm water.
- Clean brush/roller with paint thinner.
Summary: Tips For Painting Your Home
In summary there exists a season for painting your home as much as there is a season for spring cleaning. You can score some excellent deals with contractors by hiring them in their off season. Compare price and performance of the paint you or your contractors plan to use. Don't forget to clean your walls, Prep is Key, make sure your walls aren't dirty before painting. Use quality painting materials and always paint your ceiling first, start top down when painting. And if your painting project extends into a second day you can clean and reuse your painting brushes and rollers saving time and the environment.
Slide-Lok Is The Most Trusted Name In Garage Makeovers Since 1977
Solid Products, Great Prices, and Timely Technical Support since 1977! Slide-Lok Garage Interiors is the oldest, longest continuing garage makeover brand in North America. We were the first one stop shop garage makeover for storage systems and flooring. We were also one of the first outfits to offer polyaspartic floor coatings to the residential garage flooring market. Our leading polyaspartic coatings have been in use on garage floors for nearly two decades, our competitors can't make that claim. We also manufacture and sell epoxy coatings that are great for indoor floors.
There are Authorized Slide-Lok Garage Flooring and Storage dealers all over the US and Canada that can transform your boring and dull garage into your dream garage. Every garage tells a different story, let us help tell yours.
So what are you waiting for, get your FREE ESTIMATE today: Contact Slide-Lok Garage Interiors.
Become a Slide-Lok Floor Coating & Cabinet Dealer
Expand your contracting business, there are more opportunities when you carry Slide-Lok Garage Interior products. Slide-Lok is your one stop shop for garage flooring and storage solutions since 1977. Inquire today and discover the benefits of Slide-Lok Garage Interiors.
About The Author

Quindrea Yazzie is a Phoenix-based journalist who specializes in digital content and client relations. Prior to Slide-lok, she has written for The State Press as an arts and culture reporter, AZ PBS as a digital producer and breaking news reporter and Indian Country Today as a reporter and producer. She earned a bachelor’s degree in Journalism and Mass Communication from the Walter Cronkite School of Journalism and Mass Communication at Arizona State University. When she is not writing, she enjoys running, trying new coffee blends, hiking and finding new ways to be sustainable.
Keywords: home, improvement, painting, paint, season, diy, acrylic, latex, tips
© Copyright, 2020, Slide-Lok (DBA), Mirabel Coatings Inc.
Back to Posts on The Home Improvement Blog
Contact Local Dealer
Find a Slide-Lok Garage Floor & Cabinet dealer in your area.
Call: 1-800-835-1759
E-mail: Click to e-mail.
Featured Blog Posts
- Concrete Coating System Adhesion Study
- We Want To Thank Our Suppliers!
- Closed July 2-5 for Independence Day
- Best Garage Floor Coatings in Phoenix, AZ
- New Flooring Chips and Flakes Brochure - Featuring 41 Colors!
- How To Choose The Right Color To Paint Your Garage
- 41 Stock Blends of Color Chips and Flakes for Floor Coatings
- 6 New Color Chips & Flakes for Floor Coatings
- Residential and Commercial Floor Coatings in Phoenix, Arizona
- 13 New Color Chips & Flakes for Floor Coatings
- 4 Home Improvement and Organizational Tips To Elevate Your Home
- Floor Coating Video
- Failed DIY Garage Floor Coating vs. Pro
- How To Get Smoother Top Coats, Chip and Flake Floor Coating Sealer
- Closed Labor Day Weekend Sept. 4-7
- Garage Floor Coating Transformation in Laramie, Wyoming
- Flooring Chips and Flakes Now Available By The Bucket
- Closed July 3-6 For Independence Day
- Fighting Allergies During COVID-19
- Become An Authorized Slide-Lok Floor Coating and Storage Installer
- Inventory Levels and Lead Times - Impacted Supply Chains
- Flooring Chips and Flakes Brochures
- Waterborne Epoxy Garage Floor Coating Training Video
- SBA Paycheck Protection Program - CARES ACT
- Spring Cleaning During Coronavirus Pandemic
- Staying Healthy: How To Minimize Your Risks Of Catching The Coronavirus (COVID-19)
- We Are Open, Taking & Shipping Orders
- When To Paint Your House - 5 Useful Tips For Interior Painting
- 10 Ideas For Your Garage Makeover
- Surviving WOC 2020: Coronavirus (COVID-19)
- The Best Time Of Year To Paint The Exterior Of Your Home
- Two Tone Chip Epoxy Floor in Mesa, Arizona
- Fitness Center Gets Metallic Epoxy Floor Coating
- Western Coating Societies Symposium and Show 2019
- Polyurea Is Better Than Polyaspartic?
- How To Improve Your Home's Curb Appeal
- 2 Tone Garage Floor Coating in Omaha, Nebraska
- Colorado Springs Garage Floor Restoration
- Polyaspartic Coating Survives as Boat Deck Coating
- Best Wasp & Hornet Pesticide Spray From Home Depot 2019
- Polyaspartic Flooring Withstands Flooding in Austin, Texas
- Garage Makeovers Shine in Florida
- Best Garage Remodels in Phoeniz, AZ
- Best Garage Makeovers of South Carolina
- Best Floor Coatings for Auto Mechanic Shops
- Garage Floor Coating Install in Anderson, IN
- DIY Epoxy Coating Repair in Casper, WY
- Polyaspartic Garage Floor Install in Pittsburgh, PA
- Garage Flooring & Painting in Omaha, Nebraska
- Concrete Coating Install in Eagan, Minnesota
- Garage Cabinet Installation in Wyoming, Michigan
- Garage Floor Coatings Albany, IN
